Digital Mock-Up
Mock-Up
Decisions and Changes
We chose to use Balsamiq to make our mock-up, as we believe that the “wire-frame” style of the program will help us to continue receiving feedback on our design as a work in progress and communicate to test participants that we are still in a phase of design where we are testing functionality rather than aesthetics. The changes we made for making the digital mockup include:
-
The help button on the screens where the user creates their profile is now represented by a “?” icon.
-
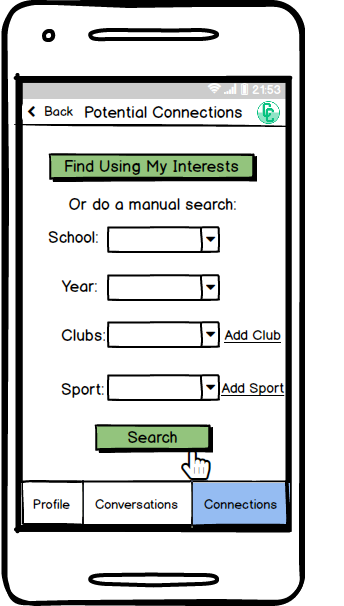
Some basic changes were made to the layout of the screens to make them better fit the Balsamiq templates (e.g. moving the “add club” and “add sport” options next to their respective search catagories on the potential connections search page).
-
We added College Connect logos to our pages, so that users know that they are on the College Connect app.
-
We added retrieve and reset password pages, in case that the user forgets their password.
-
We added a “confirm password” field, so that users won’t accidentally enter the wrong password for registration.
-
We made the text on bottom navigation buttons larger, so now it is easier for users to see.
-
We removed “see potential connections” page that was on our paper prototype, so users don’t have to press an extra button to get to the connections page.
-
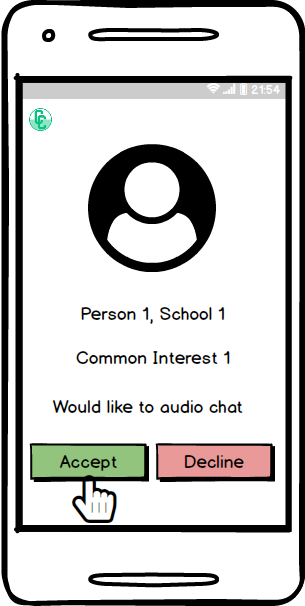
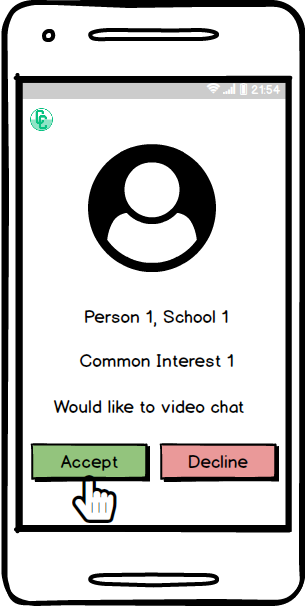
We made the audio/video chat interface more specialized for College Connect by displaying name, school, and common interests on the audio/video call invitation page.
-
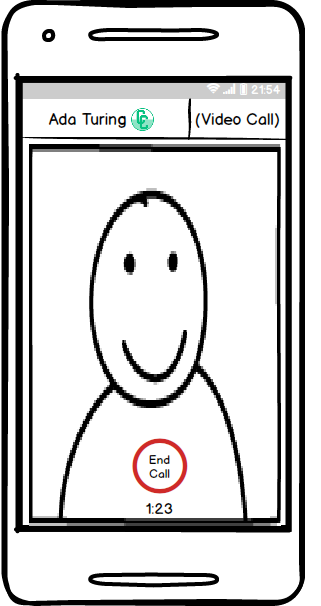
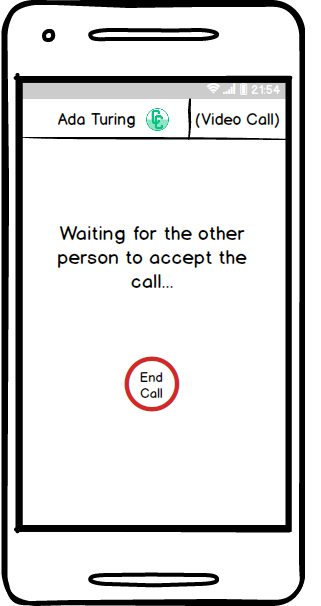
We made the video chat interface larger. Now users can make better eye contact with each other while on video chat.
Overview
Share Personal Information
Upon first opening the College Connect app, users are presented with a simple welcome screen.

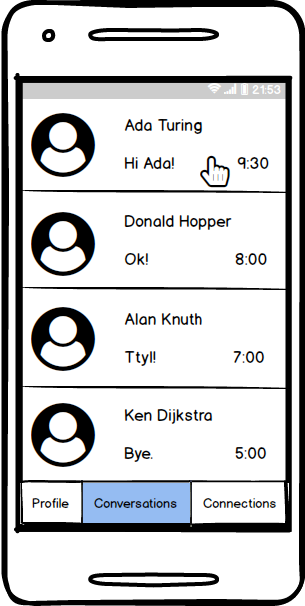
If the user has already created a College Connect profile, they will log in and be directed to their “Conversations” page:
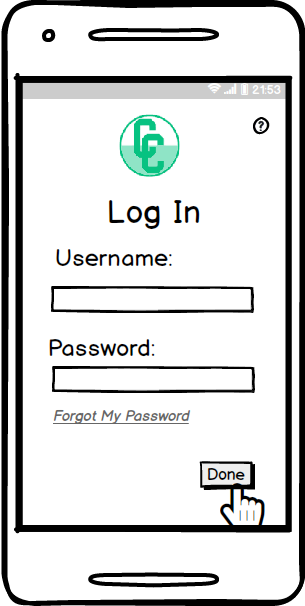
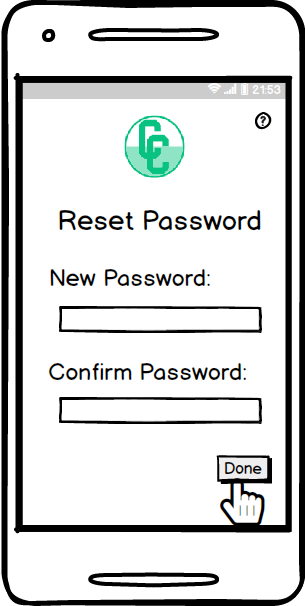
If the user forgets their password, they can press “Forgot My Password” and be redirected to “Retrieve Password” page, where they enter the security code sent to their email:

The user can then reset their password:
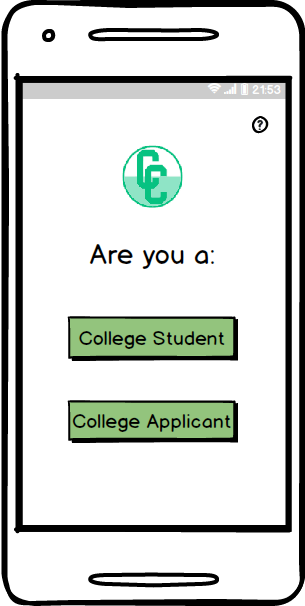
If this is a new user, instead of logging on, they will select “New User” and will be directed to a screen allowing them to designate a username and a password:

After the user presses “done”, they are redirected to a page that lets them choose their user type.
After the user selects the appropriate type, they will be directed to their personal profile screen, where they can share basic information about themselves. The screen will be slightly different for current college students (left) and applicants (right) This information includes their name, school (college students) or prospective schools (college applicants), class year, home town, interests, and a short personal bio.

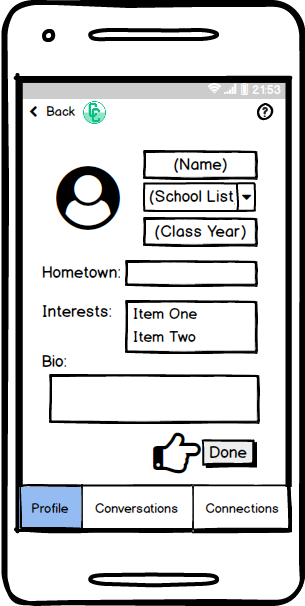
After they complete their profile and press the “done” button, they will be directed to the potential connections page.
Find Users with Similar Interests
Once the user has input their interests, they will see a list of either college or applicant students with similar interests. They can then select someone to learn more about them and other shared information.
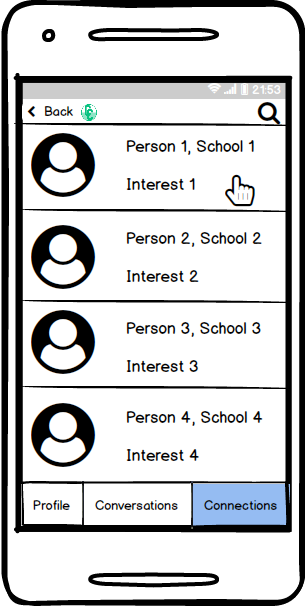
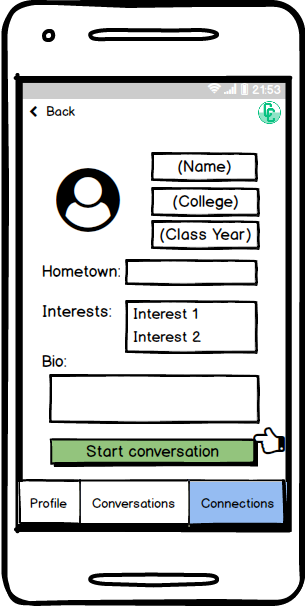
After they have selected a student, they can decide to initiate a conversation and/or learn more about others using the back button.
The user can also press “search” on the list of people page for a more customized search.
Start Conversations
The user can press the “conversation” tab to navigate to the conversation interface. This interface shows the user’s conversations with other users, ordered by recent messages. The user can press the tab with the person’s name to begin chatting with that person.
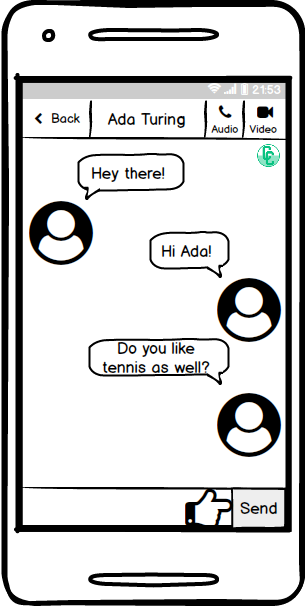
This interface allows the user to chat with another user. At the top-left corner, the back arrow takes the user back to the previous page. The name of the person with whom the user is chatting is displayed at the top. At the top-right corner are options for audio call and video call. Messages are shown in the main body of the interface, with the other person’s messages on the right. At the bottom, the user can enter a message and press “send” to send.
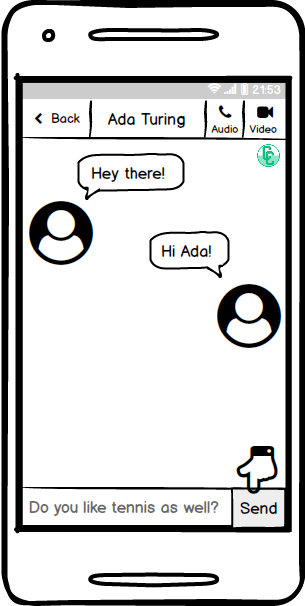
Sent message.
This is the interface after the user presses the audio call button. It waits for the other side to accept the request. The user can press “End Call” to end the call.

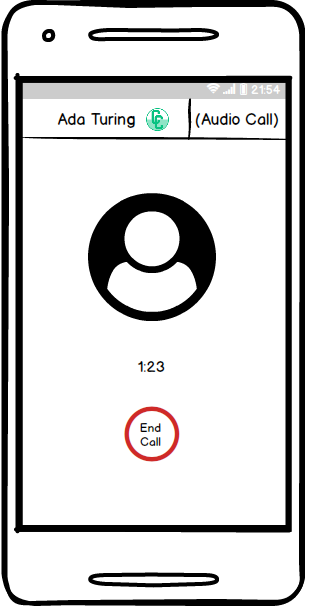
Sample audio call. The user can press “End Call” to end the call.
This is the interface after the user presses the video call button. It waits for the other side to accept the request. The user can press “End Call” to end the call.
Sample video call. The user can press “End Call” to end the call.